|
HOME RESTORATION
AUTOMOTIVE PAINTING.
PART 2.
An investment in tools and training is needed if you choose to paint your car yourself. In car painting, as in other car restoration tasks, there is no better teacher than experience. Excellent textbooks are available, but nothing compares to seeing other people's technique in action.
The basic tools needed for painting are:
An air compressor of at least 2 horsepower. This must be equipped with an oil and water trap, or these impurities will damage the paint finish. An air compressor can also be used to power air tools.
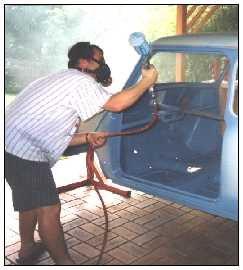
A spray gun. The cheapest spray guns that give acceptable results cost around $100, the best cost $500 or more. This translates to an improved "off the gun" finish requiring less flatting down. A spray gun is essentially an SU carburettor for paint, with a needle and jet to control the amount of paint delivered. Discuss the type of paint you will be using with the vendor; they will be able to provide the correct needle/jet set-up for the brand of paint. Cheap guns will only have one se-tup available.
Other tools such as a grinder and buffing wheel can save hours of work smoothing and buffing the finish, as well as having other uses, but hard manual labour with sandpaper and cutting compound can achieve the same results.
A room to paint in is also necessary. Acceptable results may be obtained outside if the air is still and shady, the temperature is even between 22-25 degrees Celsius, and there are few insects, deciduous trees or dusty areas nearby that are likely to contaminate the paint. In practice, the best one can hope for is to have a few contaminants that need to be sanded out and the surrounding areas repainted. To improve the chances of success, the ground and buildings around the car can be damped down with a hose to prevent dust from blowing around.
If painting inside, the room must be much cleaner than the average workshop or garage. Years of accumulated dust in the rafters and floors of a typical garage will be blown down onto your paint by the action of the spray gun stirring up the air. Roofing felt can be used to line the floor; when wetted slightly it will trap dust and dirt very effectively. Line the walls and ceiling with plastic if possible, but provide for ventilation while painting or the concentration of fumes will soon rise to a dangerous level.
Acrylic lacquer or nitrocellulose should be used by DIY painters (unless an enamel finish is required). The fast drying time minimises the amount of dirt that can stick to the paint while it is wet, and allows for defects to be sanded out shortly after the paint has been sprayed.
Health and Safety
You will encounter dozens of toxic chemicals while painting. These include organic solvents (if you can smell them, they are dissolving your brain cells), cyanide, heavy metals such as zinc, mercury, and lead, and other toxic elements such as chromium. Symptoms of exposure to these chemicals can be temporary lightheadedness, temporary and permanent immune system damage, damage to the central and peripheral nervous systems, brain damage, eye irritation or blindness, birth defects, muscle tremors, cancer, and death. Some of these symptoms can develop after brief exposure, especially to two-pack paint, of seconds or minutes in some individuals. Lacquer paint is far less dangerous than two-pack, but most people could expect to develop some sort of illness after painting a car without protective equipment.
For home use, eye goggles, chemical-resistant gloves and a dual filter air mask (carbon filter plus gauze filter), plus overalls, suffice for lacquer or enamel painting. Disposable masks are not up to the task. All this safety equipment should be available at the shop you buy your paint from.
If applying two-pack paint you will need to rent a spraybooth and take some training in safety precautions. In some countries, two-pack paint is freely available, but in others it is restricted to those with the right qualifications and equipment.
This is for a good reason. The safety equipment includes full-body protection, as isocyanates can be absorbed through the skin and eyes. A positive-pressure air-fed mask is used. This mask is fed from the air compressor and the air inside is therefore at a higher pressure than the air in the booth, preventing the isocynates from making their way into the mask.
Colour Matching.
Most restorers wish to repaint their projects in the original colours, or at least in a colour that was available for their model. Paint codes and mixing instructions for most British cars are available from good paint shops. These shops can mix the right colour based on this information, although it is unlikely to match the weathered original paint on the car.
If no information on the paint colour is available, the paint shop can mix paint to match that already on the car. The best places to match to are areas that received little wear and exposure to sunlight, such as behind the dashboard or underneath trim.
A Typical Paint Job
A typical restoration-type respray might include the following steps, using acrylic lacquer paint.
1. Paint stripping.
2. Metal conditioning. Exposed metal is rubbed down with a metal conditioning product which consists mostly of phosphoric acid. An iron phosphate coating is formed which resists rust and provides an excellent surface for the adhesion of paint.
3. Etch priming. A light coat of etch primer is applied. This usually translucent yellow-green and should not be applied thickly. Etch primer provides a good base for the rest of the paint coats. It is not necessary, but is strongly recommended.
4. Priming. Approximately four coats of primer are applied and the paint is left to dry at least overnight but preferably for at least a week.
5. Rubbing down. A fine mist of coloured paint is sprayed over the primer. The surface is then sanded back with 600-grit sandpaper. When all the colour is gone, the paint is rubbed down. If any patches of colour remain, they reveal dents that should be filled in or hammered out.
6. Top coat. Four to six top (colour) coats are applied, giving at least enough time for each successive coat to be dry to the touch. (Any more coats and the paint will be too thick, risking cracking. Anyone who boasts of the 20 coats of paint on their car is mistaken in thinking this improves the finish quality). For metallic or pearlescent paints, 4 colour coats might be followed by 3 to 5 coats of clear paint.
7. Rubbing down. The top coat is rubbed down with 1200 grit sandpaper until it loses all its gloss.
8. Buffing. A wool buffing pad is used with buffing compound to bring the surface to a mirror finish. This can be accomplished by hand but takes many times longer. Care is taken not to eat through the paint at the edges of panels.
Good Luck!
|