|
HOME RESTRORATION
With Terry Hickey.
PART 2
.
I was now ready to start the rebuild. I inspected the front and rear subframes for signs of damage and after taking careful measurements to make sure that they were straight, had them sand blasted. They were then etch primed and painted with chassis black. The rear trailing arms were rebushed, painted in chassis black and reassembled with new pivot shafts, seals, ball cups etc. New wheel bearings were installed and the hubs painted, brakes where cleaned, painted and treated to new wheel cylinders. The hydraulastic suspension ‘bags’ were replaced and the rear subframe was reassembled with new nuts, bolts and washers. The same treatment was given to the front subframe. The constant velocity joints were dismantled, cleaned, inspected, reassembled, greased and new gaiters installed. Similarly the front brakes had new calliper kits and pistons installed. The rotors were inspected, measured and it was decided that they were okay to reuse without machining. The front hydraulastic bags were okay. When completed, the subframes were wrapped in plastic to protect them from dust etc and stored in the garage. By now I had run out of money and, to some extent, enthusiasm.
I thought it appropriate that I take a couple of months off before getting stuck into the body, which was clearly going to be a very big job and one that I had very little previous experience in. During this period my wife and I decided to build a new home and my ‘lay off’ extended for the next 12 months. As you could imagine, the move played havoc on the restoration project, particularly my non existent parts ‘storage and cataloguing system’. There was one very major benefit though, which was that I now had a much more spacious garage in which to sort the jigsaw puzzle out.
By the end of 1992, I was ready to start the body and there was quite an inventory of things that had to be done before I could even start to think about painting. Up until this point my project had been travelling on fairly safe ground - whilst not a mechanic, I have had years of practice fiddling with cars and mechanical bits and pieces and was quite comfortable in this area.
However, whilst I have been on the ‘wet and dry’ end of several repaints, I had never had any experience with substantial body work or panel replacement and it was in this area that I made a couple of very elementary mistakes which would end up costing me plenty - not only in dollars but also in lost time and enthusiasm. Details of these mistakes will be covered later in this article, I will simply say at this point that I had been a little bit more careful and inclined to follow the elementary advice that is set out in nearly every restoration book I have ever read, I would have saved myself a substantial sum of money and a great deal of frustration. My genuine advice to anyone contemplating a restoration is pay attention to the advice of the experts - they do know what they are talking about.
With the help of a very good friend, I replaced the left side front guard and outer hinge panel which was accident damaged and had some rust. The front panel on the car was not the original and was replaced with an original ‘vertical braced’ panel sourced from the a local 2nd hand parts supplier.
A new battery box was welded in as were new tail light sections (they had been cut out by the previous owner in order to fit Clubman type tail lights) and a new section welded into the lower dash rail. Extensive panel work was also done to the rear panel and boot floor to fix previous accident damage and we must have welded up about 50 holes that had been drilled in the body here and there for installing such things as the screw on flairs, roll bars etc.
By mid 1993 the body was once again sound and solid and ready for paint preparation, though it would be mid 1994 before it commenced in earnest. Preparation for paint commenced with a coarse abrasive rub down of the entire shell to remove any traces of the protective coat of clear lacquer that I had sprayed 3 years earlier. The shell was then treated with rust inhibitor and sprayed with etch primer.
Starting at the left front guard, each panel was worked over and smoothed with minimal quantities of filler where required. At this point I should say that even though purists are against the use body filler, I believe that if panels are properly prepared and usage is minimal, body filler has a very valuable place in home restoration projects, especially where the restorer is a novice and not skilled enough to do lead wiping. I would much rather see a car nicely restored through the sensible use of body filler etc. than not restored at all because the owner cannot justify the expense of having a craftsman prepare the body using lead wiping and body filing techniques. Once each of the panels were smoothed, it was then time to coat the entire shell with ‘high/low’ spray filler and flatten back with fine grade wet and dry in preparation for paint. To allow access to the underside of the car, an old mattress was obtained and the car was turned on to its side. The underside was coated with ‘stoneguard’ and then given 4 top coats of enamel. The shell was turned upright again and the interior, engine bay and boot where each given 4 coats of enamel. Because I wanted the exterior finish to be very high quality and it was being painted in a home garage, I decided that the exterior would be finished in acrylic lacquer rather than enamel. Acrylic lacquer is easy to apply and probably the best paint selection for a novice - mistakes can be easily remedied and a good quality finish is almost assured if you prepare properly. Good spray gun technique is not as essential as with other finishes. The downside of using acrylic is that it is a high maintenance finish which requires much more after care and attention to keep it in good condition.
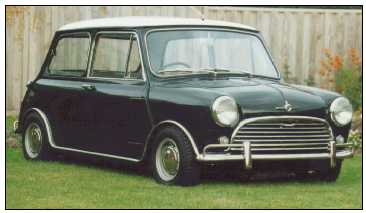
It was only after many many hours of rubbing, ‘dust coating’ and rubbing again that the big day arrived and we were ready to apply the top coats to the exterior. First the underside, interior, boot and engine bay had to be masked off to ensure that no acrylic overspray got on to the enamel. The roof was given 4 coats of the original Toga White and was then flattened back, another 4 coats sprayed, fattened and followed by 4 coats of clear acrylic. After a week for this to properly dry, the roof was masked off and the body itself was treated to the same 4x4x4 coat combination, but this time the colour was the original British Racing Green.
It was now mid December 1995 and due to work commitments it would be several months before the body would be wet rubbed with 1200 grade wet and dry and buffed. The result was like a mirror and I could not believe that such a result could have been achieved by two novices. Highly motivated by the beautifully painted and shiny shell, I purchased and installed a new wiring loom, new brake lines, fuel line, hydraulastic suspension lines and then got straight into fitting up the steering rack that I had previously rebuilt and the already rebuilt and assembled subframes. Within very little time the shell was back on its wheels and starting to look like a car again. I was also starting to think that I was pretty good at DIY car restoration. However, ‘pride got the before a fall’.
The grief that was to follow in part three next month.
Terry.
|